

Thunder
Registered user
I’d fitted the GSA winglets to my previous GS and was aware of the benefits for rider and passenger, so when I found that the 2008 version of the bike now comes with support brackets for winglets and accessory sockets as part of the new frame it seemed like a waste not to head off to the dealers for the necessary bits. 
Parts that are required including how many and BMW part numbers are:
SLIPSTREAM DEFLECTOR LEFT 1 46637694399
SLIPSTREAM DEFLECTOR RIGHT 1 46637694400
FILLISTER HEAD SCREW M5X20SI 4 06327657966
FLAT WASHER 4 46612308594
BUSH 6,9X2,3 4 46637664846
NUT M5 4 52532308647
Before you remove the beak feel underneath for the mounting bracket and mark the position of the mounting holes with a pencil on to the underside its worth marking the position of the accessory sockets as well just for reference.
To remove the beak I found it’s best to remove the tank panel first, on the previous bike this was not necessary but on the new model it’s a lot harder and while I eventually got the beak off it was at the risk of cracking it and I could not get it back into position with the tank panel in place.
Removing the tank panel is a lot easier than the previous model thanks to the new filler cap. Remove the side panels first (2 screws at the rear and one at the front on the stainless steel panel), then the rear tank panels (2 screws and it unclips), then the filler cap itself, remove the 4 black screws only and lift it clear. For safety I’d recommend putting a clean rag into the filler cap just in case you drop one of the screws.
Finally remove the 2 screws joining the tank panel to the beak, lift the tank panel and slide it to the rear of the bike.
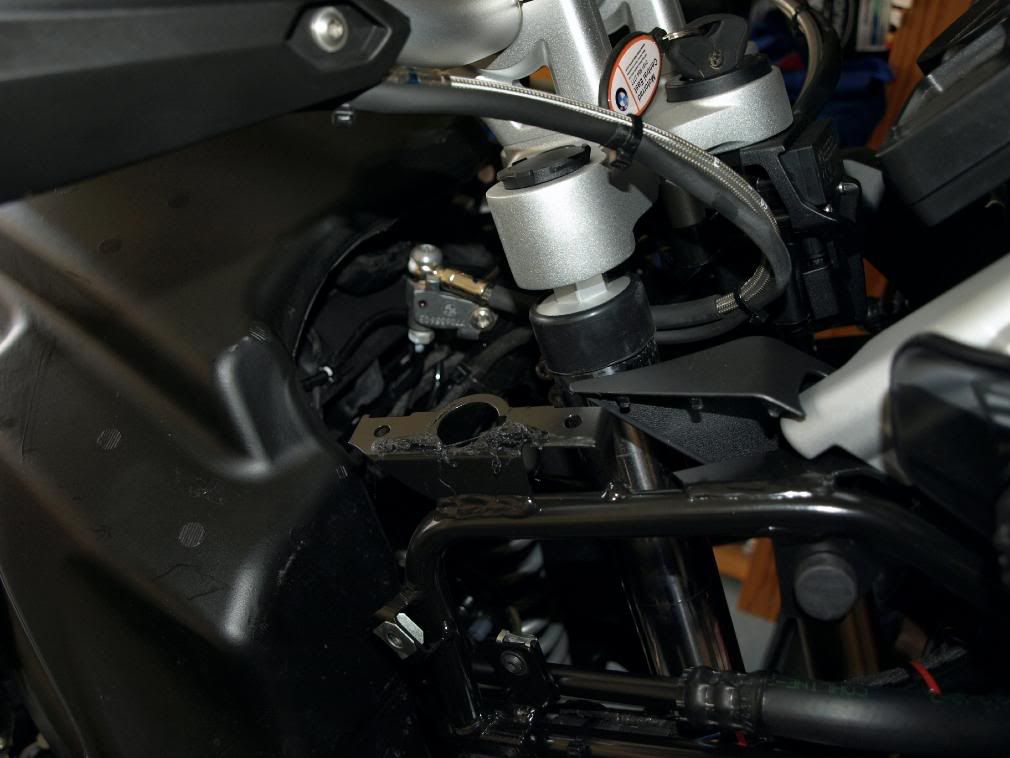
To remove the beak there are 2 screws at each side, once removed you will be able to slide the beak forward to remove it, but be aware BMW have used mastic on the winglet bracket to prevent vibrations (see previous photo) and it means gently freeing the back of the beak. Take it easy at this part you do not want to crack the panel it’s a tighter fit than the previous version owing to the redesigned sub frame.
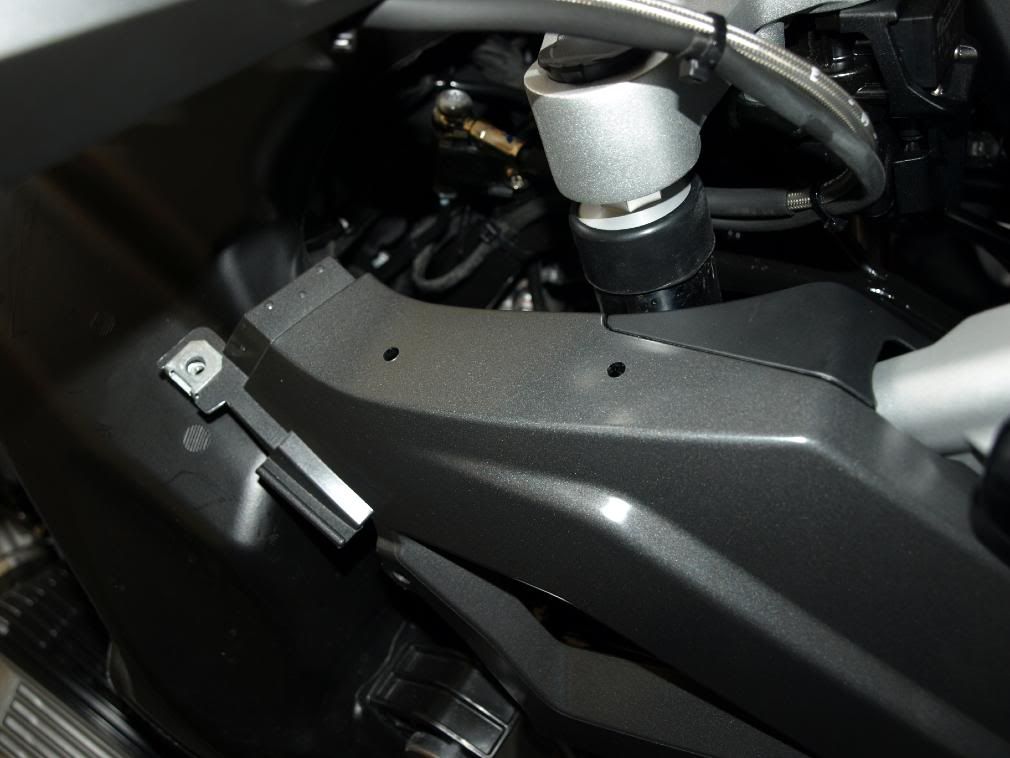
Once removed you will be able to see the positions you previously marked on the underside of the beak, they should be positioned within 2 squares formed in the plastic. If not refit and check them again, you do not want to drill holes in the wrong place at this point.
Drill a small pilot hole (3mm worked for me) at each mounting point and again refit the beak to check it is centred over the mounting point, if all is in place drill a final 6 mm hole to accommodate the 5mm flat head screw used to mount the winglets.
Before refitting the beak slip one 5mm spring nut over the frame at each mounting point, refit the beak and secure it in place.
Place a plastic bush under each hole of the winglet and a washer on the top then screw each winglet in place, don’t over tighten them.
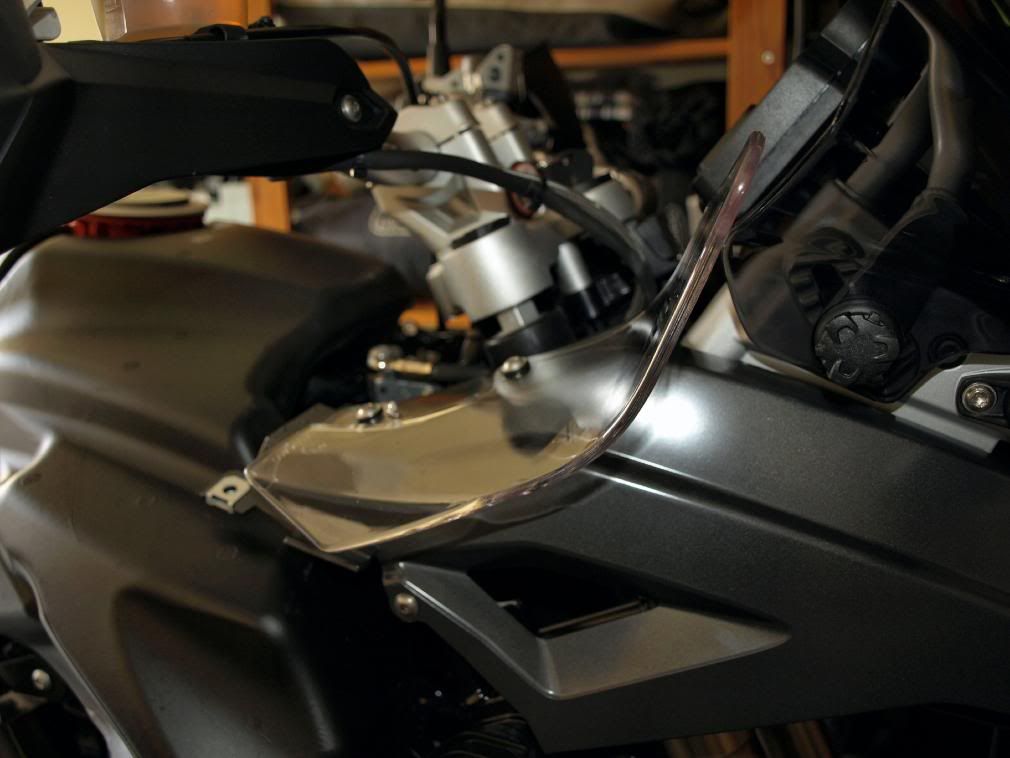
Finally refit the tank and side panels and go try out the new deflectors.
Parts that are required including how many and BMW part numbers are:
SLIPSTREAM DEFLECTOR LEFT 1 46637694399
SLIPSTREAM DEFLECTOR RIGHT 1 46637694400
FILLISTER HEAD SCREW M5X20SI 4 06327657966
FLAT WASHER 4 46612308594
BUSH 6,9X2,3 4 46637664846
NUT M5 4 52532308647
Before you remove the beak feel underneath for the mounting bracket and mark the position of the mounting holes with a pencil on to the underside its worth marking the position of the accessory sockets as well just for reference.
To remove the beak I found it’s best to remove the tank panel first, on the previous bike this was not necessary but on the new model it’s a lot harder and while I eventually got the beak off it was at the risk of cracking it and I could not get it back into position with the tank panel in place.
Removing the tank panel is a lot easier than the previous model thanks to the new filler cap. Remove the side panels first (2 screws at the rear and one at the front on the stainless steel panel), then the rear tank panels (2 screws and it unclips), then the filler cap itself, remove the 4 black screws only and lift it clear. For safety I’d recommend putting a clean rag into the filler cap just in case you drop one of the screws.
Finally remove the 2 screws joining the tank panel to the beak, lift the tank panel and slide it to the rear of the bike.
To remove the beak there are 2 screws at each side, once removed you will be able to slide the beak forward to remove it, but be aware BMW have used mastic on the winglet bracket to prevent vibrations (see previous photo) and it means gently freeing the back of the beak. Take it easy at this part you do not want to crack the panel it’s a tighter fit than the previous version owing to the redesigned sub frame.
Once removed you will be able to see the positions you previously marked on the underside of the beak, they should be positioned within 2 squares formed in the plastic. If not refit and check them again, you do not want to drill holes in the wrong place at this point.
Drill a small pilot hole (3mm worked for me) at each mounting point and again refit the beak to check it is centred over the mounting point, if all is in place drill a final 6 mm hole to accommodate the 5mm flat head screw used to mount the winglets.
Before refitting the beak slip one 5mm spring nut over the frame at each mounting point, refit the beak and secure it in place.
Place a plastic bush under each hole of the winglet and a washer on the top then screw each winglet in place, don’t over tighten them.
Finally refit the tank and side panels and go try out the new deflectors.


