
You are using an out of date browser. It may not display this or other websites correctly.
You should upgrade or use an alternative browser.
You should upgrade or use an alternative browser.
Ducati 250 Desmo Rebuild
- Thread starter ebbo
- Start date


Lots of heat and 3in1 oil started to produce slight movement, more heat and more oil eventually got it fully free. I was very happy at this point 
<iframe width="560" height="315" src="https://www.youtube.com/embed/BO9Td6qASr8?ecver=1" frameborder="0" allow="autoplay; encrypted-media" allowfullscreen></iframe>
<iframe width="560" height="315" src="https://www.youtube.com/embed/BO9Td6qASr8?ecver=1" frameborder="0" allow="autoplay; encrypted-media" allowfullscreen></iframe>
Then I found I couldn't get brake arm off it's bloody splines 
Eventually that too came loose and I got it off, it was still a tight fit on the splines but after cleaning the splines and working the lever on and off some 50+ times in various positions it now slips on and off real easy
So, it's off to see Ray later in the week, see what he has to say
Eventually that too came loose and I got it off, it was still a tight fit on the splines but after cleaning the splines and working the lever on and off some 50+ times in various positions it now slips on and off real easy
So, it's off to see Ray later in the week, see what he has to say
Picked up all the parts from TripleS today, what a great job! Everything looks to have been masked off perfectly and the shine on the gloss black is super
The fork legs and yokes are textured satin black, the yokes look superb but the fork legs look a bit coarse in places but I'm going to roll with it, it'll look terrific!
Youve been done! They have nicked the airer frames!
Youve been done! They have nicked the airer frames!
Fear not Steve, the airer frames complete with pine lats are hung in the utility room above a big radiator, wife very happy
Loving it ebbo......It's cold and wet outside so you might as well just bang on with this.....Crack on !!........
Loving it ebbo......It's cold and wet outside so you might as well just bang on with this.....Crack on !!........
Progress so far, airer hung and working
Swing arm and centerstand back in the frame
Headstock bearings replaced, Steering lock fitted (the old chrome cover was like new under a thick coat of black paint, the lock itself was like new)
Rear suspension acorn nuts specially made by a man on eBay M10x1mm
Attachments

The bolts holding the discs and carriers to the hub came undone real easy but the disc was stuck fast on the bearing carrier. I left that for the afternoon soaking in WD40 before attacking it again later on. It came apart with gentle persuasion
Hmm, obviously Mafia tactics are essential Ducati mechanic's skills!
")
The front wheel wthout its carriers and disc - It can carry another disc and the fork leg has mountings for another caliper... Interesting!
Intersting, my 'fantasy' Spanish made Ducati, the 350 Vento, has twin disks and even a disk on the rear. Maybe a bit OTT given the light weight but certainly impressive!
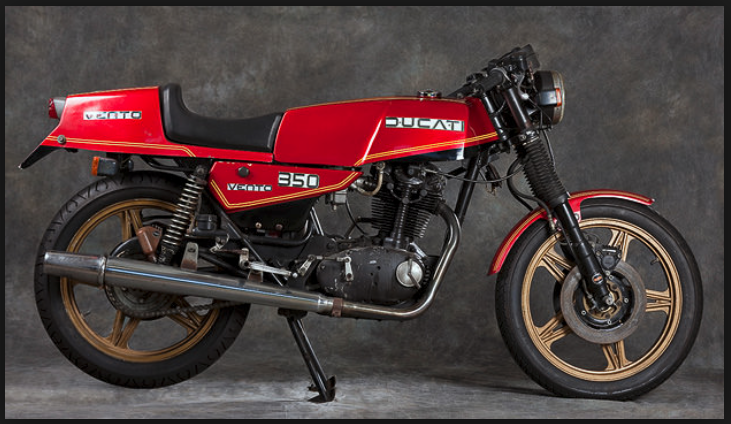
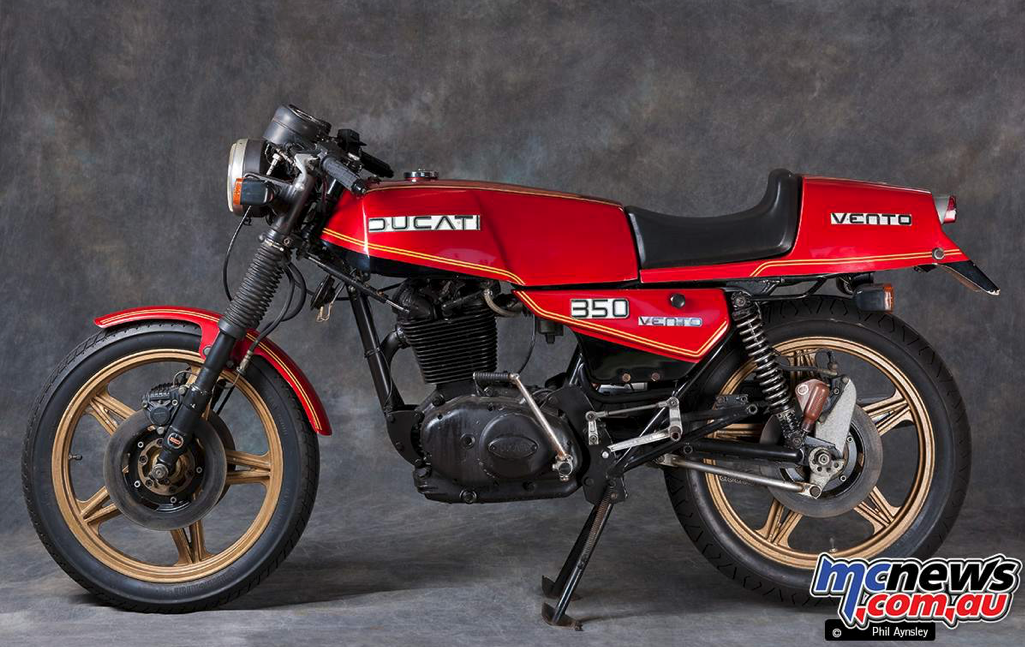
Having said that, typical of Ducati singles hardly any two were the same ...
Keep up the good work!
Simon
I really do fancy twin discs, And that harks back to my RD350 which would also have taken a second disc, I just never got around to it. But I’m going to resist for now, I’m sure it doesn’t need it
Hmm RD 350, now that was a real motorbike, you've always had good taste I see!
This may not look like much but is in fact a big step forward in restoring the bike, These are the two new fork top nuts. I had no idea where I was going to get these and what made it worse I didn't know what size they were or even exactly what they looked like, Ceriani made quite a few different types around this time. Loads of research on the net and I finally found them on Classic and Vintage Suspension. I had lots of help from the seller Ben and he posted them out with various other fork seals pronto, I had them the very next day. Now I can start putting the forks back together
Attachments


This may not look like much but is in fact a big step forward in restoring the bike, These are the two new fork top nuts. I had no idea where I was going to get these and what made it worse I didn't know what size they were or even exactly what they looked like, Ceriani made quite a few different types around this time. Loads of research on the net and I finally found them on Classic and Vintage Suspension. I had lots of help from the seller Ben and he posted them out with various other fork seals pronto, I had them the very next day. Now I can start putting the forks back together
Beautiful!!!
Simon
Damper assembly's ready to go in the stanchion legs. Unbelievably these had survived un disturbed and un rusted laid in a small wooden draw for decades As far as I could tell, all the parts were in the correct order, all they needed was a wash off in fresh solvent (my favourite, petrol).
Everything was clean and all the working surfaces were lightly oiled with 3in1 oil but the first set would not go in, the piston was binding badly and so was the lower alloy sleeve, all they wanted to do was jam. In the end I had to resort to fine emery paper to smother down the piston and sleeve, then it slide in as if nothing had ever been wrong
As far as I could tell, all the parts were in the correct order, all they needed was a wash off in fresh solvent (my favourite, petrol).Everything was clean and all the working surfaces were lightly oiled with 3in1 oil but the first set would not go in, the piston was binding badly and so was the lower alloy sleeve, all they wanted to do was jam. In the end I had to resort to fine emery paper to smother down the piston and sleeve, then it slide in as if nothing had ever been wrong
Attachments


Deleted account 211025001
Registered user
- Joined
- Feb 3, 2005
- Messages
- 10
- Reaction score
- -1
Great stuff and Ebbo, thanks for the link to the suspension guys, very useful for my Bultaco
Andres
Andres
Talk to Ben, he’s a very helpful guyGreat stuff and Ebbo, thanks for the link to the suspension guys, very useful for my Bultaco
Andres

You can get in touch via Facebook too
Great stuff ebbo....
When you started this I really thought that you had your work cut out, but it's now all coming together nicely.
Very well done Sir......
When you started this I really thought that you had your work cut out, but it's now all coming together nicely.
Very well done Sir......
Bendy toy
Registered user
I’ve just done my Suzuki Kettle forks.
Remove the clamp bolts and wedge the yoke clamps with a flat screwdriver blade. It won’t need to be knocked in very hard so be careful (of course). Put the blade parallel to fork leg so don’t risk catching the chrome.
Remove the clamp bolts and wedge the yoke clamps with a flat screwdriver blade. It won’t need to be knocked in very hard so be careful (of course). Put the blade parallel to fork leg so don’t risk catching the chrome.


Similar threads
- Replies
- 8
- Views
- 199
- Replies
- 5
- Views
- 1,161