
SJRoome
Registered user
When the original collector box rusted through in July 1999 I fitted a Keihan stainless steel Y piece and downpipes.
There is considerable discussion on this and other forums on the effect this has on the engine. The Keihan downpipes have no balance pipe and the Y piece is so shaped that the left hand exhaust enters the system at right angles, so that the pressure waves are going to get reflected back up the downpipe toward the engine.
I don’t remember much effect on the bike, but at the time I was struggling to get the carburation right due to the jets constantly clogging with a fine red dust. I finally found out that this dust was due to the compound BMW used to coat its petrol tanks disintegrating and solved it using electrolysis and coating the tank with POR15. You can read about this here (http://www.ukgser.com/forums/showthread.php/188228-Rusty-tank-repair).
When considering what to upgrade this year I decided to go for a better set of downpipes and a Y piece from BMW boxer supplies. Here goes...
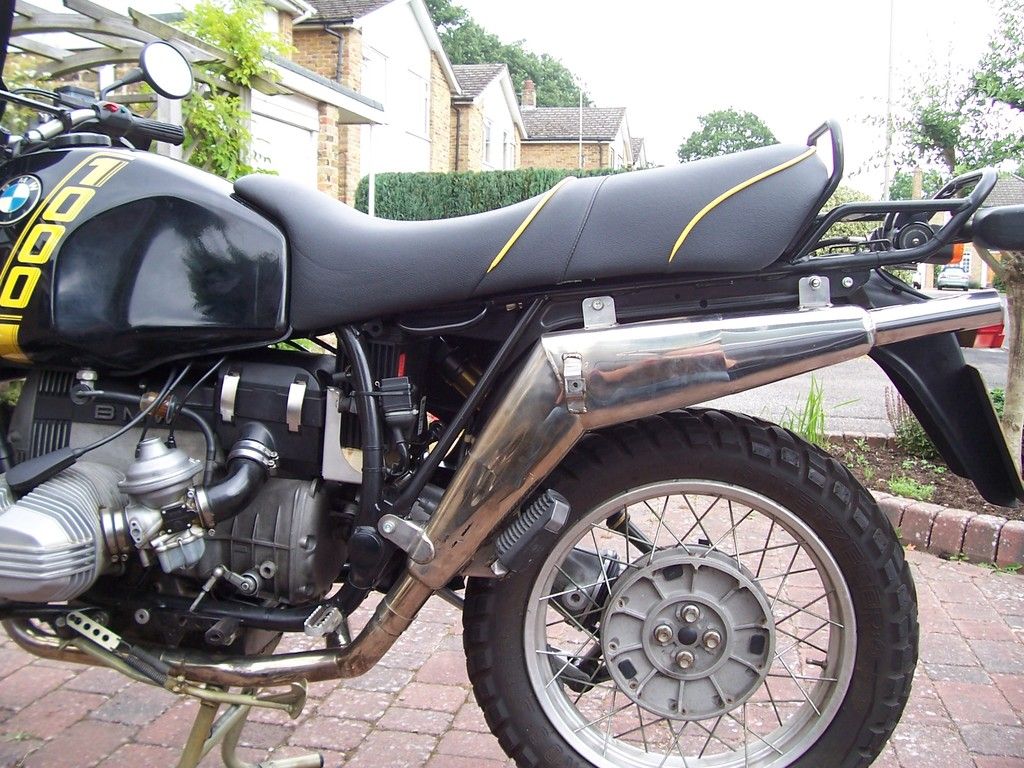
Removing the exhaust cover reveals the current Keihan exhaust including the original silencer.
Undoing and removing the two bolts and the nut, then loosening the clamp allows the silencer to be twisted off, which came off without much difficulty.
Undoing the two exhaust clamps allows the Y piece to be pulled off, which again came off without much difficulty.
I tried the exhaust nut spanner on the left hand nut and after exerting the maximum force I was comfortable with, it refused to budge. I have seen videos of people hitting the spanner with a hammer, but after having previously stripped the exhaust port threads I decided to go straight to chiselling the nut off. Those engine bars will have to come off!
If you look closely you can see this exhaust port has been reconditioned. I started cutting the nut using a 1in cutting disk in a Draper multi-tool. This was the first cut.
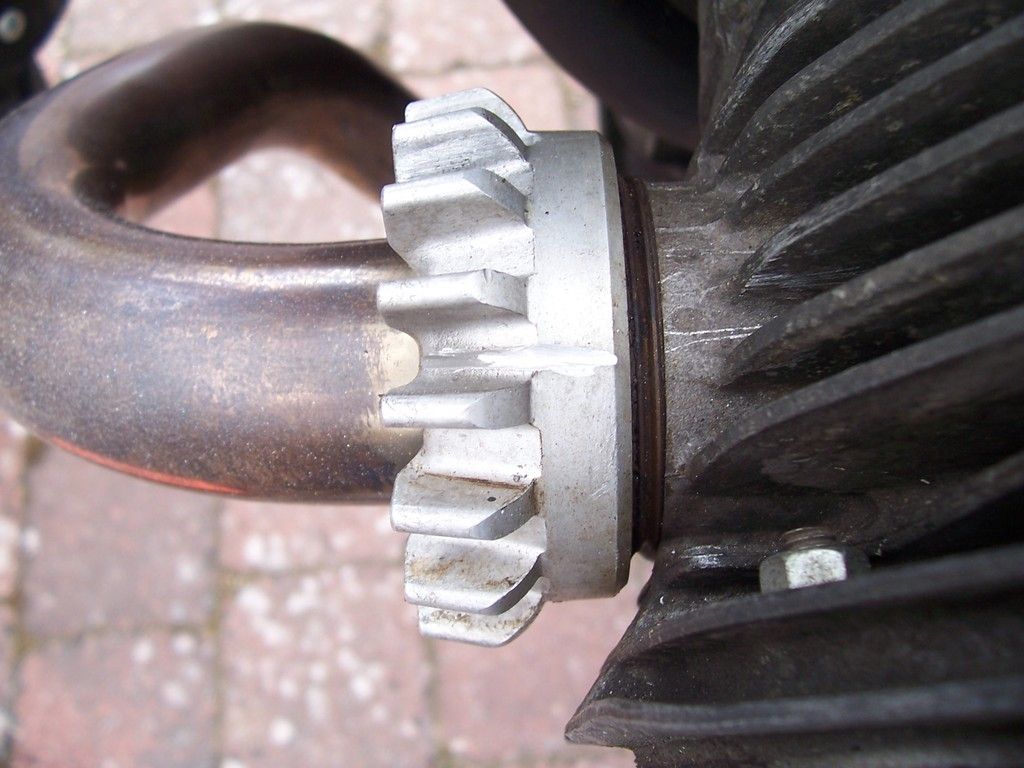
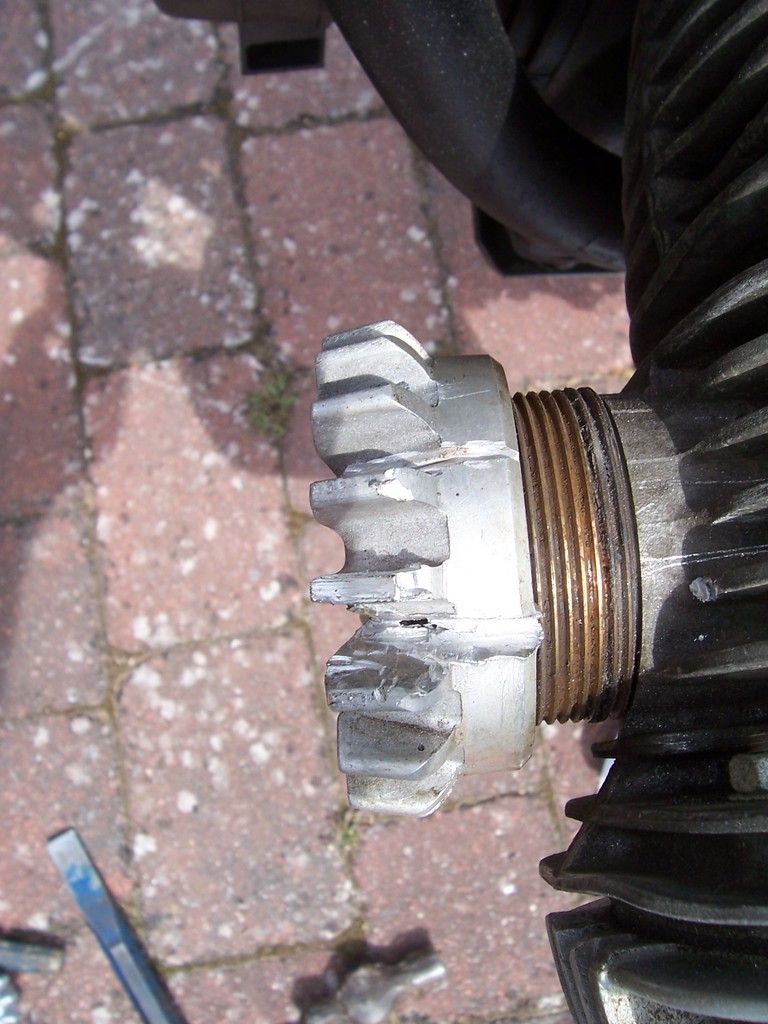
Gingerly I kept cutting as I didn't want to damage the exhaust threads or the downpipe. You can see I am through the nut at one end now, but I have slightly marked the downpipe.

I put masking tape on the pipe to protect it and carried on. Once I had cut as far as I could with the multi-tool I did a second cut and then started to open the cuts with a chisel.

The nut withstood a surprising amount of damage before suddenly turning. It could then be removed by hand.
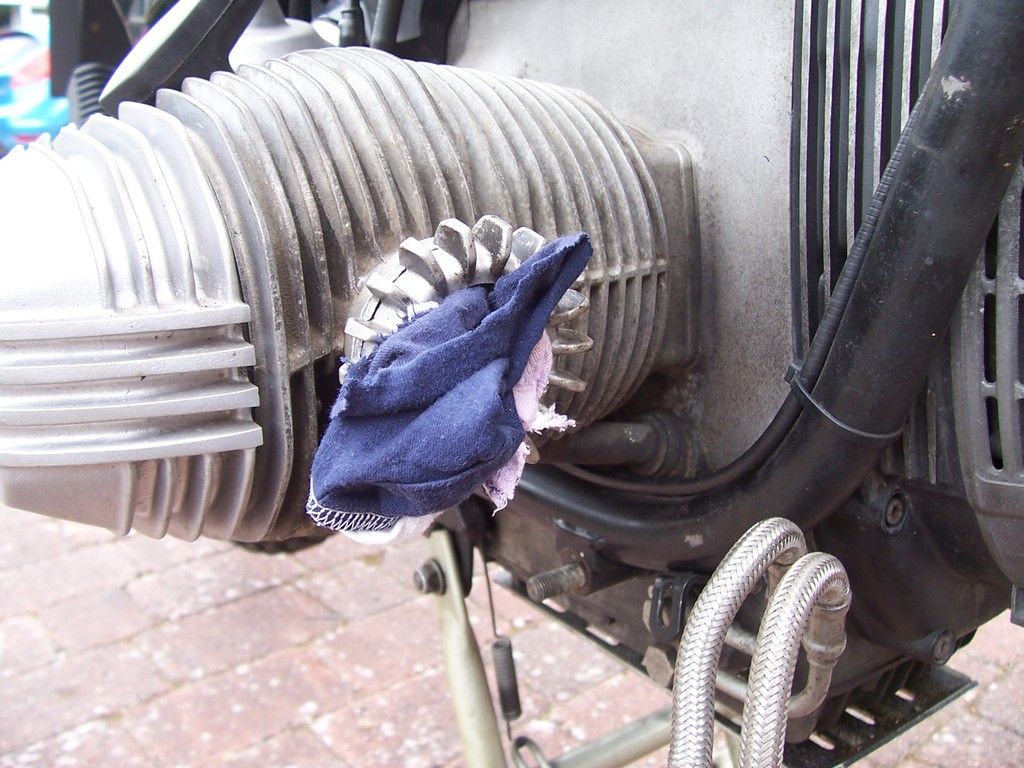
Using a rag to keep dirt out of the exhaust port I turned my attention to the right hand pot. After unbolting the oil cooler and removing the crash bar I gave the exhaust spanner another go and to my surprise the exhaust nut unscrewed.
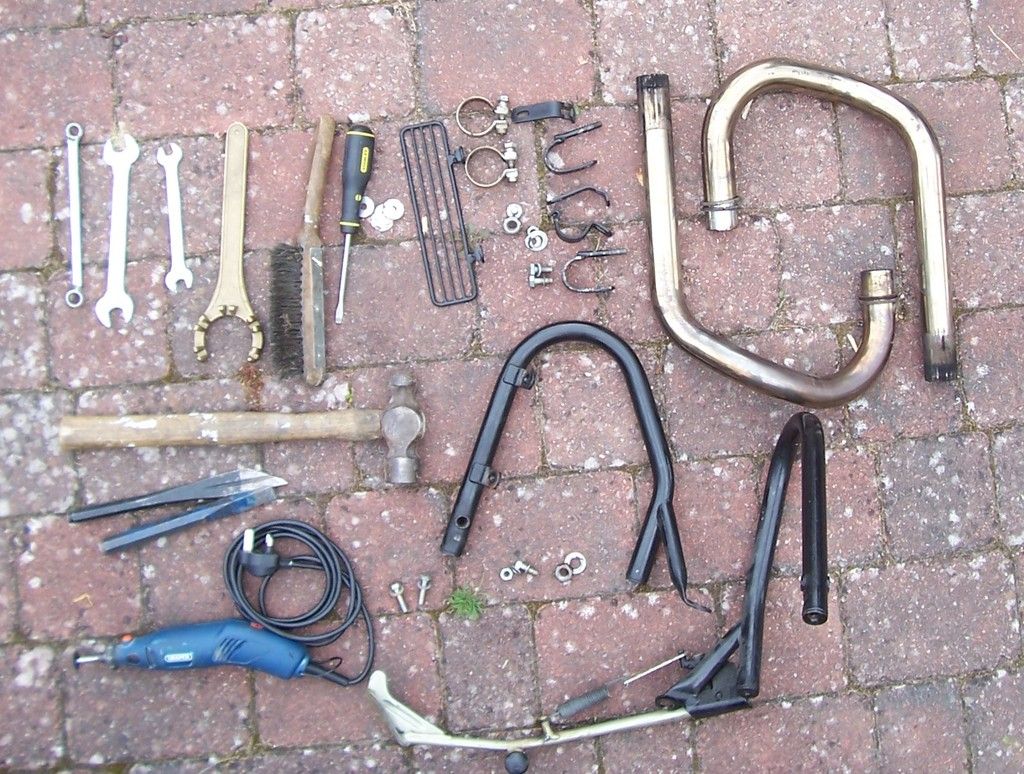
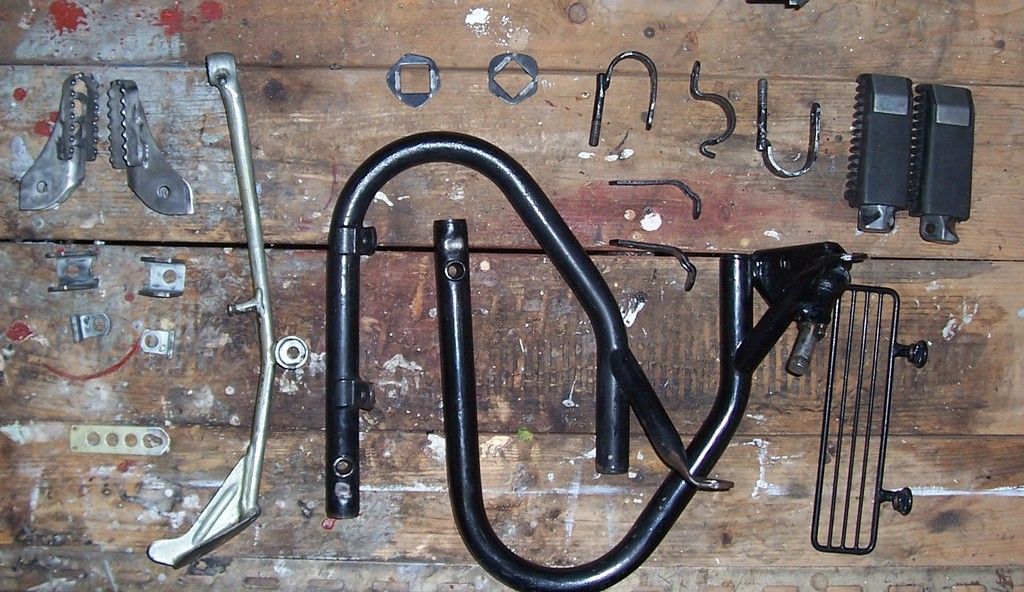
Here is everything I removed and the tools I used.
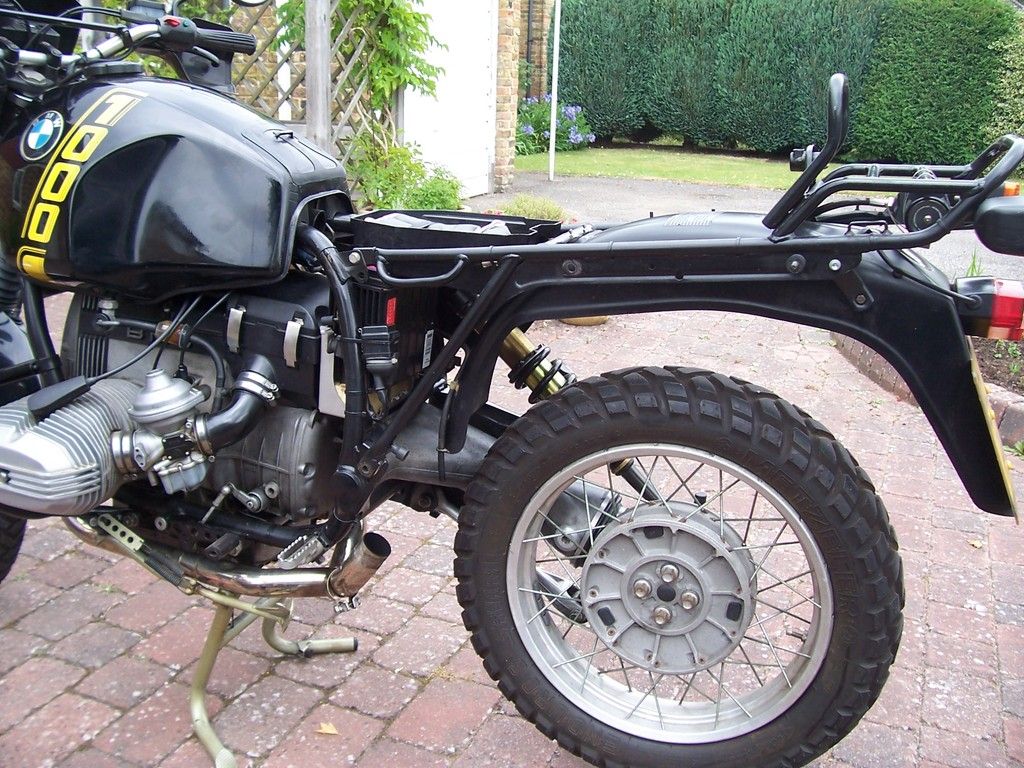
With the exhaust and crash bars removed it was easy to get at normally difficult to clean areas so I spent some time cleaning the bike. I then also removed the foot pegs and decided to clean and paint everything I had taken off. Here are the parts on the workbench awaiting the first coat of primer.
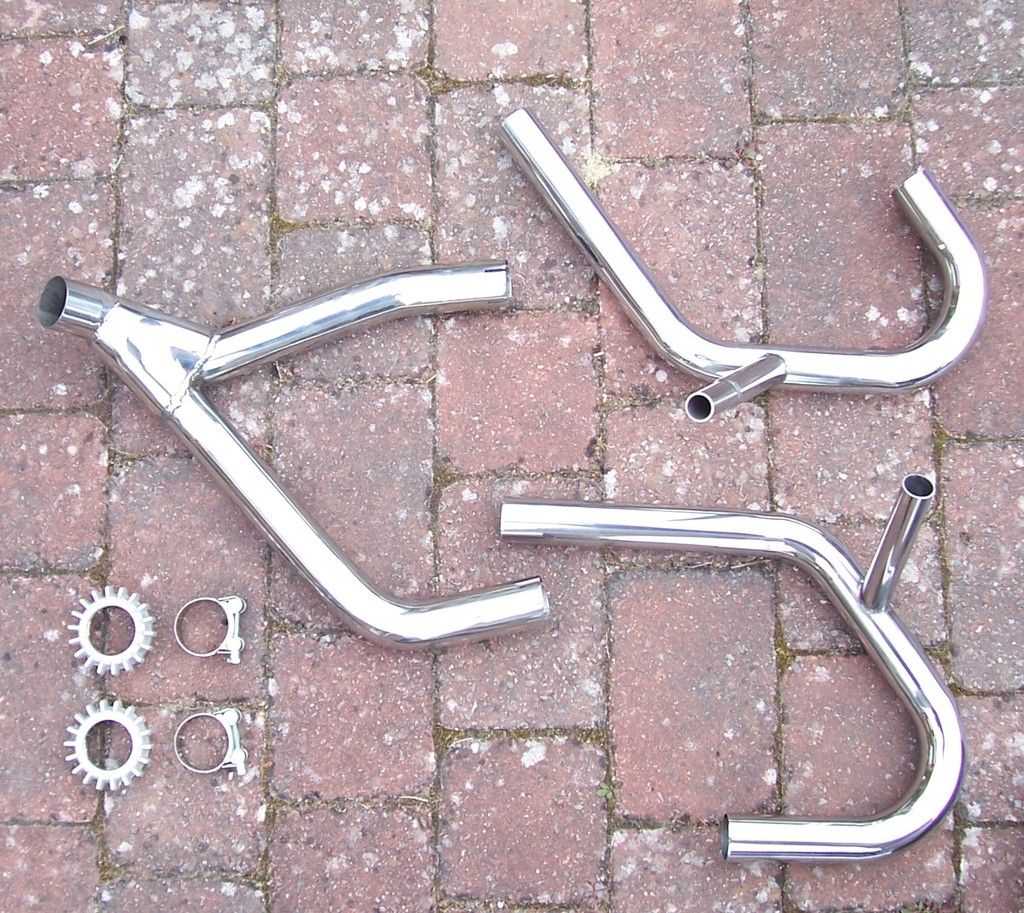
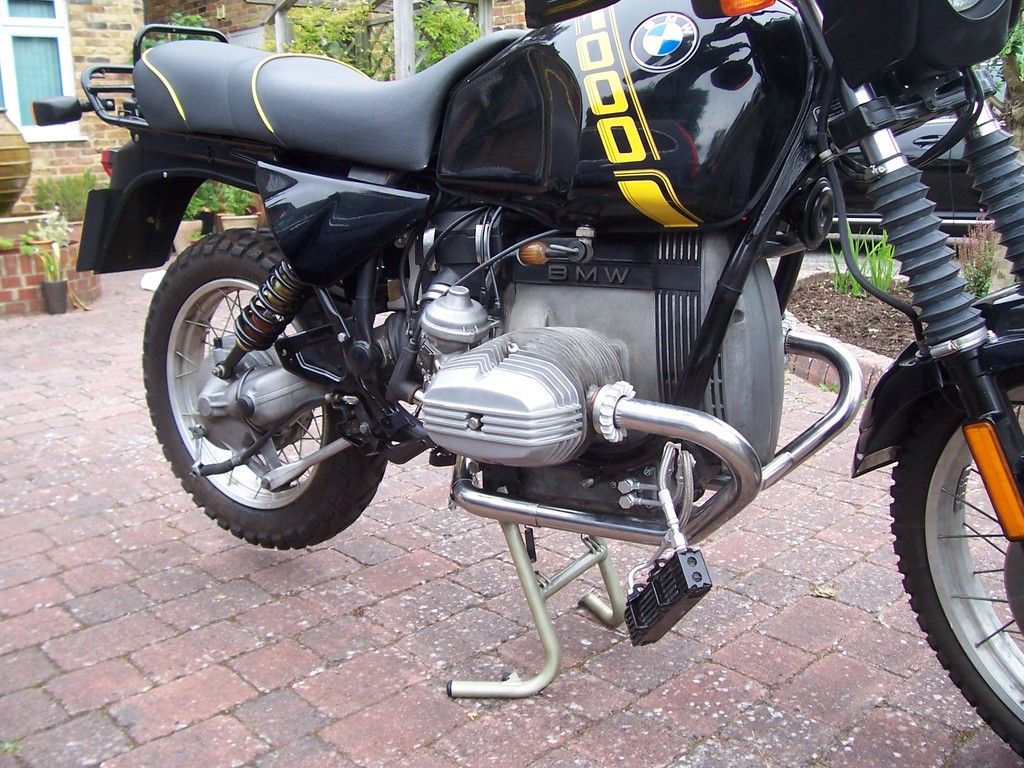
Here are the new exhaust parts. You will see the downpipes have a balancer pipe and the Y piece gives much better flow to the left hand cylinder's exhaust. I am reusing the original silencer, so I polished it so it does not look too out of place next to the new parts.
First I checked all the exhaust parts and checked they fitted together. The Y piece cost €274 (not including shipping) so I was not very pleased to find some idiot had dropped it and put a flat on it.
I decided not to return it. Instead I hammered the flat out using a hammer and one of the old downpipes.
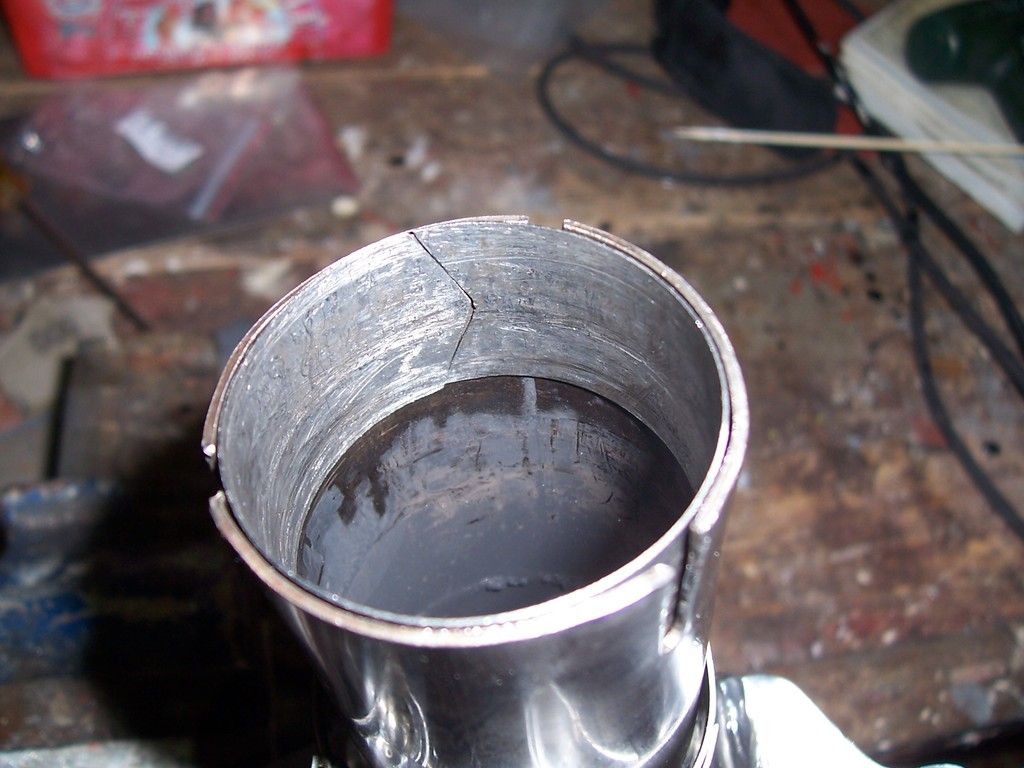
There should be a gasket between the Y piece and the silencer. I had not ordered one and I did not want to wait for one so I made one out of stainless steel sheet.
I then fitted the downpipes and Y piece, reusing the old exhaust port gaskets.
And I did not let a sudden burst of rain stop me twisting on the silencer and bolting it on.
I stopped work then planning to run the engine the next day and check for leaks.
When I did start the engine the next day it was immediately apparent that the left exhaust port was leaking badly. Removing the exhaust nut I found that in my efforts to get the silencer on I had pushed the downpipe out of the exhaust port.
I then investigated different ways of assembling the exhaust system, and why it was proving difficult to get the silencer on without dislodging the left hand down-pipe.
The exhaust comes without instructions so here is what I found to be the best method of installing this exhaust system.
(a) Inspect and push-fit the entire system off the bike to check it all fits together.
(b) Push fit each down-pipe separately into its exhaust port and check it goes in all the way. I had to clean the inside of one port with emery paper to ensure this happened.
(c) Push the two halves of the balance pipe together until there is about 12mm (1/2in) of the smaller diameter pipe still showing. Put on the exhaust port gaskets and nuts ensuring they are the correct way around.
(d) Push the two downpipes into the exhaust pipes at the same time, making small adjustments to the separation of the downpipes until they align with the two exhaust ports.
(e) Check both down-pipes are inserted fully into the exhaust ports and use masking tape to mark the depth they should be inserted.
(f) Use heavy duty cable ties to hold the left-hand down-pipe in place. Tighten them as much as you can without breaking them. Put on the exhaust clamps, checking that the bolt-heads on them are facing the way you want in the final result.
(g) Push the right hand side of the Y piece slightly over the right hand down-pipe, then from the left-hand side of the bike use your right hand to push the Y piece onto both downpipes at once. Use a piece of wood to align the left-hand tube with the Y piece opening.
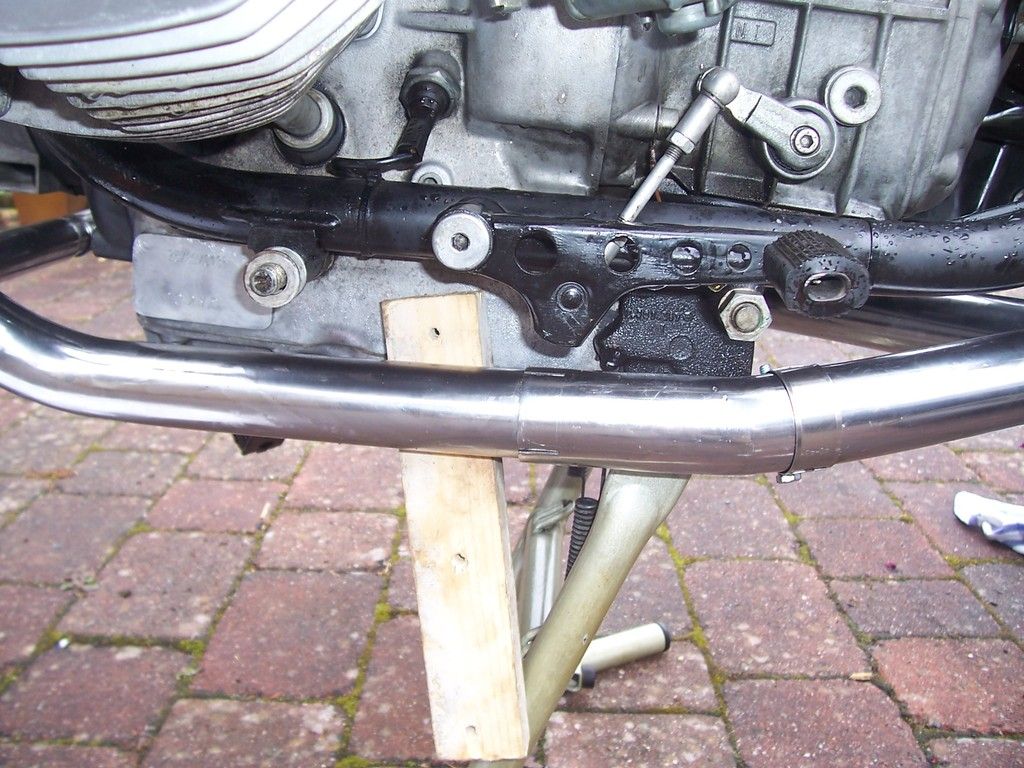
(h) Insert the gasket into the silencer and screw the silencer onto the Y-piece outlet whilst pulling firmly on the left-hand down-pipe with your left hand. Once the hole in the exhaust bracket is aligned with the hole on the frame, check that the down-pipe has not moved.
(i) Bolt the silencer to the frame first next to the Y Piece, then at the top and finally at the rubber mounting.
(j) Add copper anti-sieze to the threads of the exhaust ports before threading on and tightening the exhaust nuts.
(k) Tighten the exhaust clamps. Start the engine and test for leaks.
After I attached the exhaust I found no leaks. I then put the footrests back on, replacing the nuts and bolts with stainless.
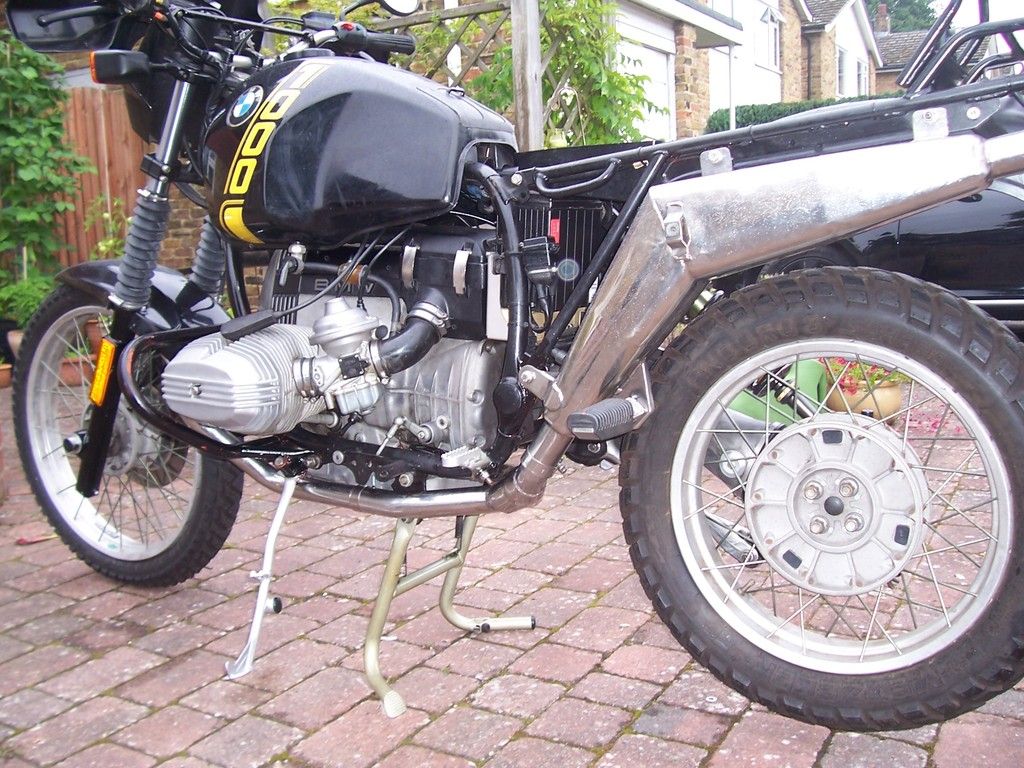
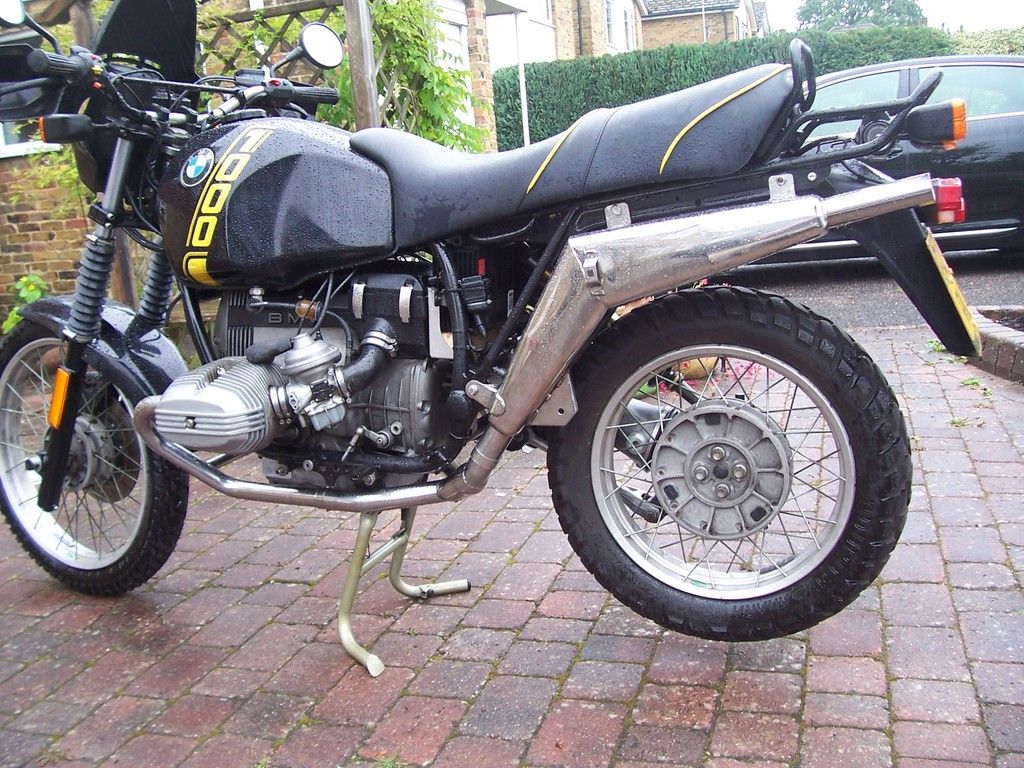
Here is the result from the other side. Put the side-stand springs back on and job done!
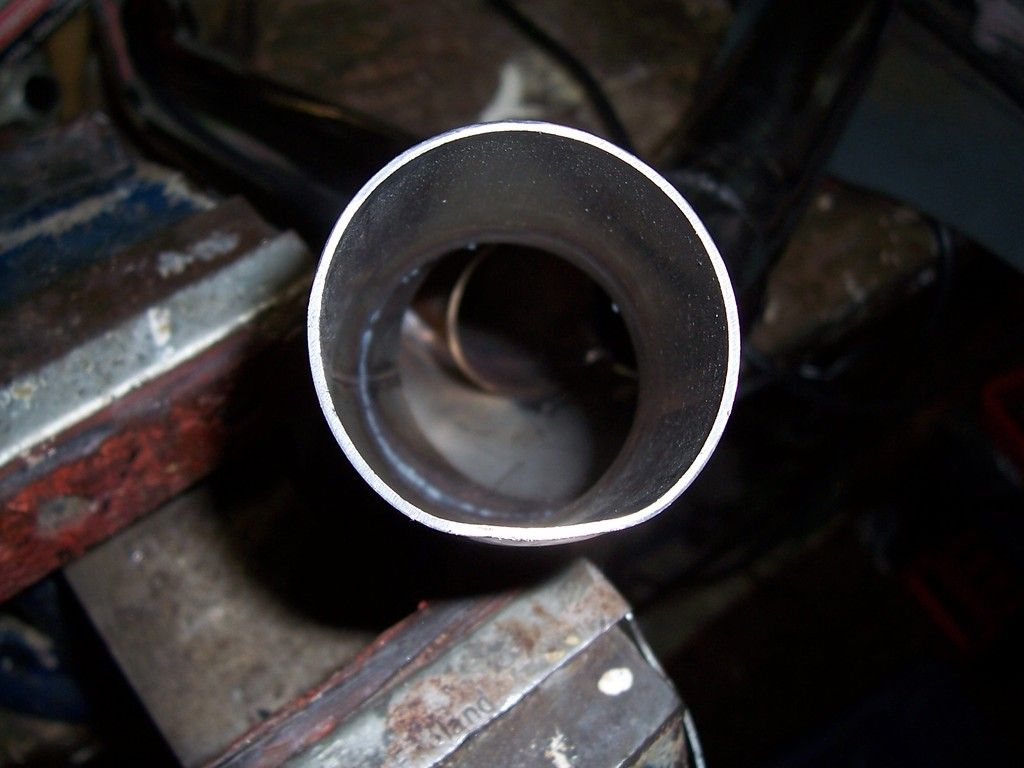
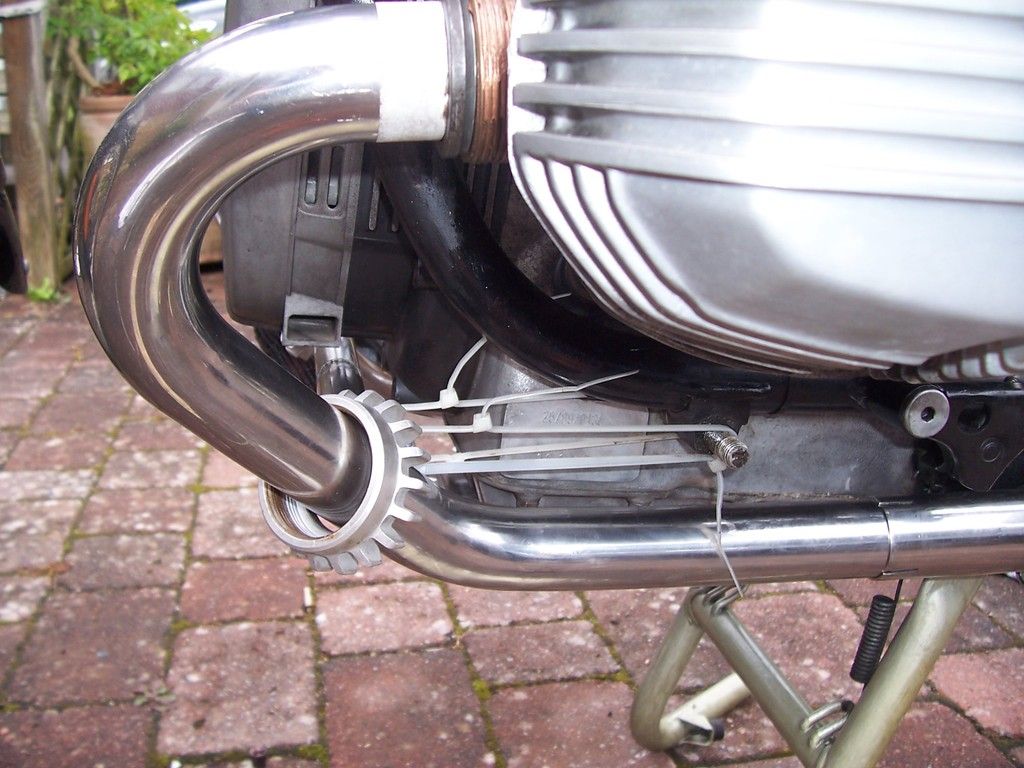
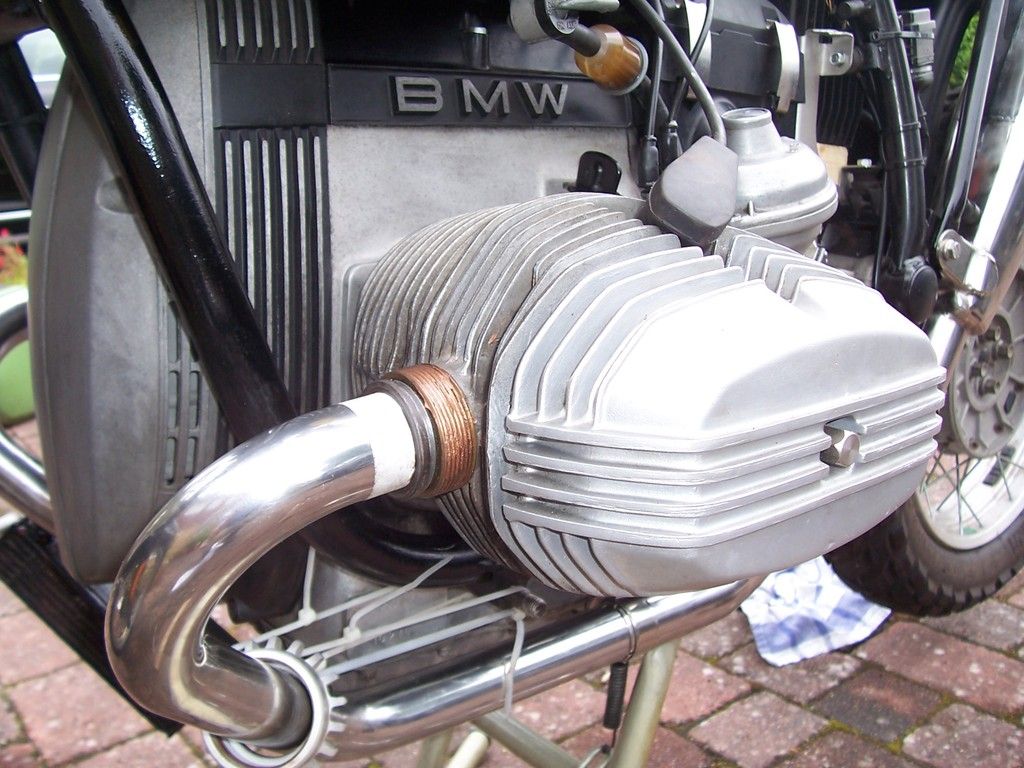
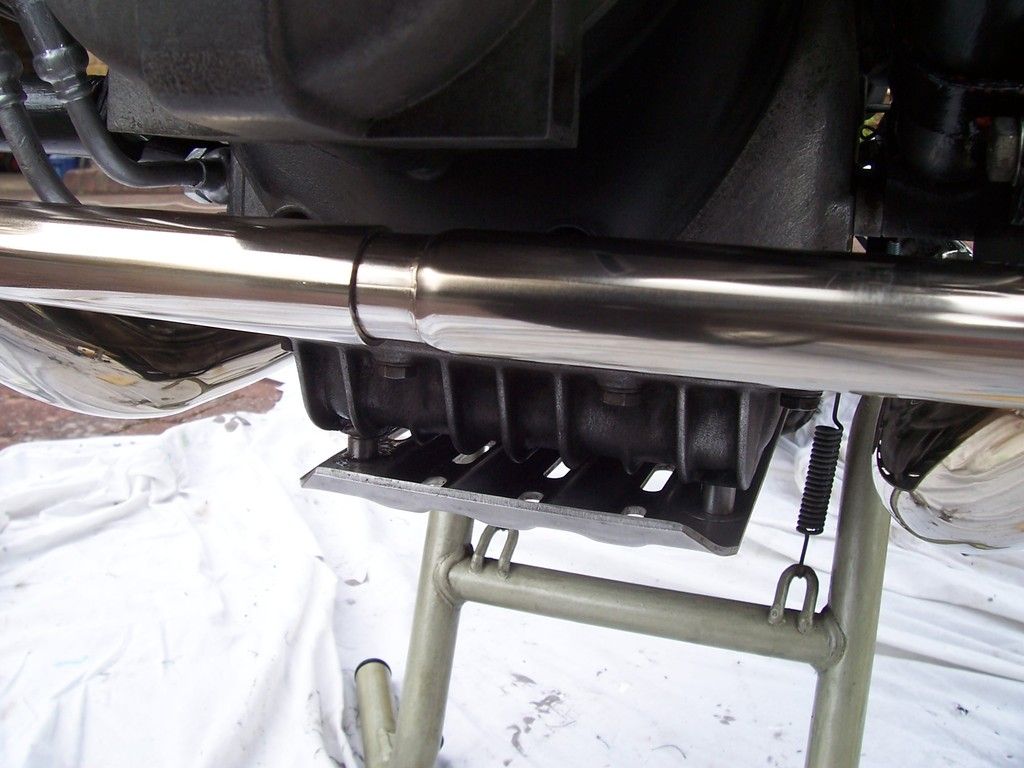
Here is a close-up of the balance pipe showing the 12mm piece of narrower pipe showing. The pipes are such a close fit there is no leakage.
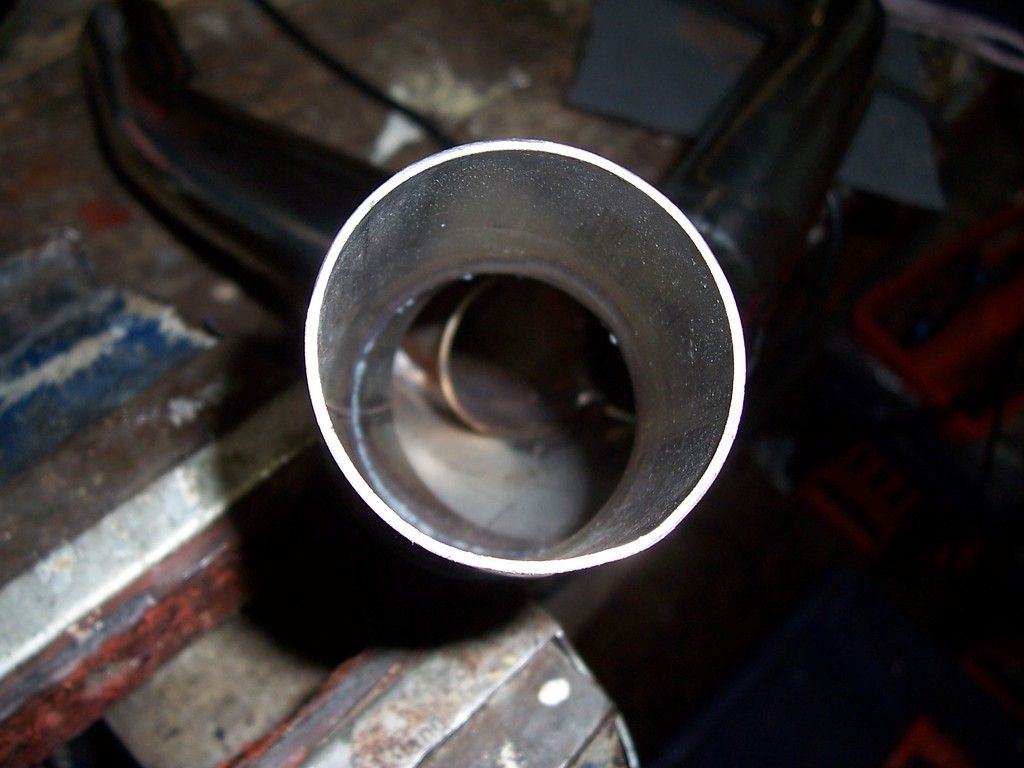
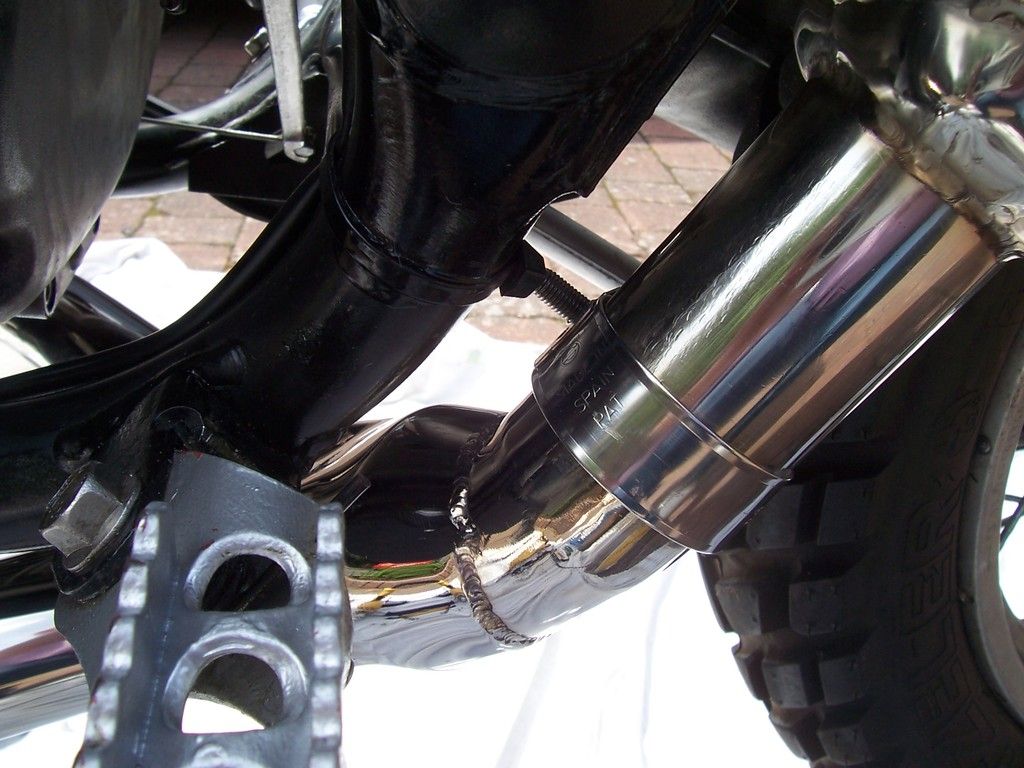
And here is a close-up showing the junction between the old and the new. When I polished the silencer I did not attempt to remove the scratches as it has marks from nearly 30 years of use but it polished up quite well.
Put the side-stand springs back on and job done! Now, what shall I upgrade next?
There is considerable discussion on this and other forums on the effect this has on the engine. The Keihan downpipes have no balance pipe and the Y piece is so shaped that the left hand exhaust enters the system at right angles, so that the pressure waves are going to get reflected back up the downpipe toward the engine.
I don’t remember much effect on the bike, but at the time I was struggling to get the carburation right due to the jets constantly clogging with a fine red dust. I finally found out that this dust was due to the compound BMW used to coat its petrol tanks disintegrating and solved it using electrolysis and coating the tank with POR15. You can read about this here (http://www.ukgser.com/forums/showthread.php/188228-Rusty-tank-repair).
When considering what to upgrade this year I decided to go for a better set of downpipes and a Y piece from BMW boxer supplies. Here goes...
Removing the exhaust cover reveals the current Keihan exhaust including the original silencer.
Undoing and removing the two bolts and the nut, then loosening the clamp allows the silencer to be twisted off, which came off without much difficulty.
Undoing the two exhaust clamps allows the Y piece to be pulled off, which again came off without much difficulty.
I tried the exhaust nut spanner on the left hand nut and after exerting the maximum force I was comfortable with, it refused to budge. I have seen videos of people hitting the spanner with a hammer, but after having previously stripped the exhaust port threads I decided to go straight to chiselling the nut off. Those engine bars will have to come off!
If you look closely you can see this exhaust port has been reconditioned. I started cutting the nut using a 1in cutting disk in a Draper multi-tool. This was the first cut.
Gingerly I kept cutting as I didn't want to damage the exhaust threads or the downpipe. You can see I am through the nut at one end now, but I have slightly marked the downpipe.
I put masking tape on the pipe to protect it and carried on. Once I had cut as far as I could with the multi-tool I did a second cut and then started to open the cuts with a chisel.
The nut withstood a surprising amount of damage before suddenly turning. It could then be removed by hand.
Using a rag to keep dirt out of the exhaust port I turned my attention to the right hand pot. After unbolting the oil cooler and removing the crash bar I gave the exhaust spanner another go and to my surprise the exhaust nut unscrewed.
Here is everything I removed and the tools I used.
With the exhaust and crash bars removed it was easy to get at normally difficult to clean areas so I spent some time cleaning the bike. I then also removed the foot pegs and decided to clean and paint everything I had taken off. Here are the parts on the workbench awaiting the first coat of primer.
Here are the new exhaust parts. You will see the downpipes have a balancer pipe and the Y piece gives much better flow to the left hand cylinder's exhaust. I am reusing the original silencer, so I polished it so it does not look too out of place next to the new parts.
First I checked all the exhaust parts and checked they fitted together. The Y piece cost €274 (not including shipping) so I was not very pleased to find some idiot had dropped it and put a flat on it.
I decided not to return it. Instead I hammered the flat out using a hammer and one of the old downpipes.
There should be a gasket between the Y piece and the silencer. I had not ordered one and I did not want to wait for one so I made one out of stainless steel sheet.
I then fitted the downpipes and Y piece, reusing the old exhaust port gaskets.
And I did not let a sudden burst of rain stop me twisting on the silencer and bolting it on.
I stopped work then planning to run the engine the next day and check for leaks.
When I did start the engine the next day it was immediately apparent that the left exhaust port was leaking badly. Removing the exhaust nut I found that in my efforts to get the silencer on I had pushed the downpipe out of the exhaust port.
I then investigated different ways of assembling the exhaust system, and why it was proving difficult to get the silencer on without dislodging the left hand down-pipe.
The exhaust comes without instructions so here is what I found to be the best method of installing this exhaust system.
(a) Inspect and push-fit the entire system off the bike to check it all fits together.
(b) Push fit each down-pipe separately into its exhaust port and check it goes in all the way. I had to clean the inside of one port with emery paper to ensure this happened.
(c) Push the two halves of the balance pipe together until there is about 12mm (1/2in) of the smaller diameter pipe still showing. Put on the exhaust port gaskets and nuts ensuring they are the correct way around.
(d) Push the two downpipes into the exhaust pipes at the same time, making small adjustments to the separation of the downpipes until they align with the two exhaust ports.
(e) Check both down-pipes are inserted fully into the exhaust ports and use masking tape to mark the depth they should be inserted.
(f) Use heavy duty cable ties to hold the left-hand down-pipe in place. Tighten them as much as you can without breaking them. Put on the exhaust clamps, checking that the bolt-heads on them are facing the way you want in the final result.
(g) Push the right hand side of the Y piece slightly over the right hand down-pipe, then from the left-hand side of the bike use your right hand to push the Y piece onto both downpipes at once. Use a piece of wood to align the left-hand tube with the Y piece opening.
(h) Insert the gasket into the silencer and screw the silencer onto the Y-piece outlet whilst pulling firmly on the left-hand down-pipe with your left hand. Once the hole in the exhaust bracket is aligned with the hole on the frame, check that the down-pipe has not moved.
(i) Bolt the silencer to the frame first next to the Y Piece, then at the top and finally at the rubber mounting.
(j) Add copper anti-sieze to the threads of the exhaust ports before threading on and tightening the exhaust nuts.
(k) Tighten the exhaust clamps. Start the engine and test for leaks.
After I attached the exhaust I found no leaks. I then put the footrests back on, replacing the nuts and bolts with stainless.
Here is the result from the other side. Put the side-stand springs back on and job done!
Here is a close-up of the balance pipe showing the 12mm piece of narrower pipe showing. The pipes are such a close fit there is no leakage.
And here is a close-up showing the junction between the old and the new. When I polished the silencer I did not attempt to remove the scratches as it has marks from nearly 30 years of use but it polished up quite well.
Put the side-stand springs back on and job done! Now, what shall I upgrade next?


